MORE BUSHWALKS from
THE GREAT ALPINE ROAD
As well as the walks already described as part of the main text, the walks detailed via this link are for those travellers with plenty of spare time, and a sense of adventure. The longer walks require a set of formal walking shoes/boots and trekking poles.
Wangaratta’s One Mile Creek Path
The Razorback and Mount Feathertop
Falls to Hotham Alpine Crossing
Bairnsdale’s Riverside Walking Path
Wangaratta’s One Mile Creek Path [AWTGS-2]
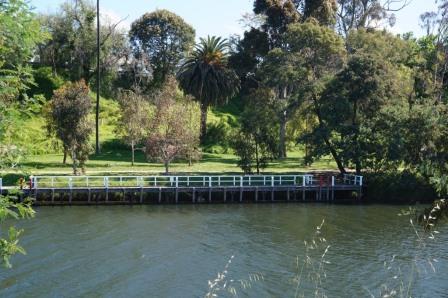
This is the main dedicated walking/cycling route in Wangaratta, and basically follows One Mile Creek, a waterway that has its catchment area to the south-west of the city. This popular route starts at Cribbes Road (on the south-west side) and from here, heads towards the Yarrawonga Road (on the northern side of the city). The pathway then swings towards the city centre, passing the Northern Beach area (alongside the Ovens River) and then the riverside precinct.
If you are staying at the Painters Island Caravan Park, then the walk is easily accessible by just crossing over either of the nearby pedestrian bridges, and turning right. More details can be found under the Wangaratta description.
Bright - Harrietville Trail [AWTGS-2]
The Bright to Harrietville shared pathway (pedestrian and cycle) basically follows the GAR from Bright to Germantown, and the next section (that includes several new bridges) leads off to Freeburgh, Smoko and Harrietville.
The complete route covers about 24km (each way) and offers a mix of surroundings, with the best scenery to be found between Germantown and Freeburgh, and then from McMahons Road through to the Harrietville Trout Farm, and then to the next contact point with the GAR.
For pedestrians, the best sections are,
from Germantown to the Old Harrietville Road, and return (about four kilometres).
From the Old Harrietville Road through to the Freeburgh Caravan Park, and return (about six kilometres).
From McMahons Road, through to the Smoko bushcamp (about five kilometres one-way).
From the Smoko bushcamp to Bibby Lane rest area (about three kilometres one-way).
From Bibby Lane through to the next contact point with the GAR (about five kilometres one-way)
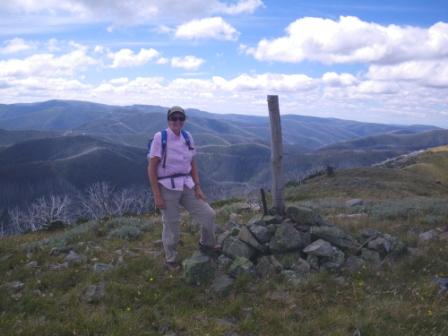
Mount Sugarloaf [AWTGS-2]
The walk to Mount Sugarloaf (1511m) leads off from the GAR at Buckland Gap (1350m), about 17km from Harrietville, not far beyond Corbetts Flat.
This is a ‘there-and-back’ route, so the distance covered is a matter of choice, however to go all the way to Mount Sugarloaf, and return, is a four kilometre adventure.
Having taken care with parking near the start (the GAR is not particularly wide at this point), the action starts by taking the un-signposted Gunns Track upslope to the Mount.
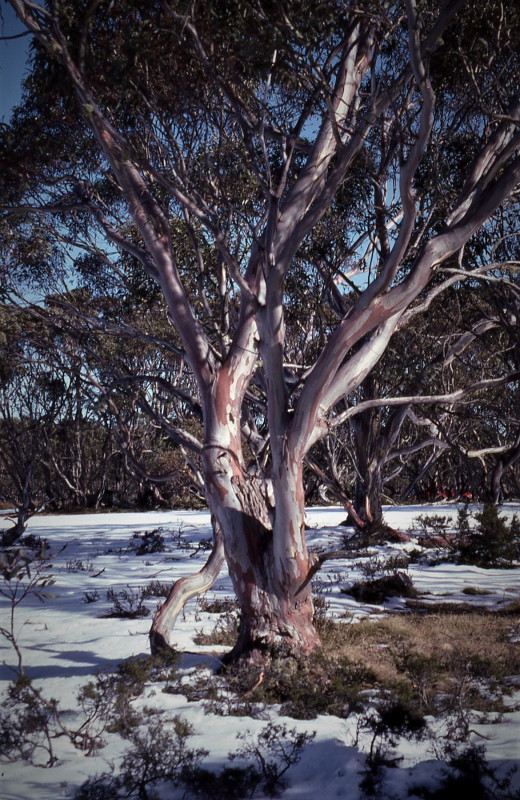
This is accompanied by some excellent alpine scenery, including a lovely snowgum woodland.
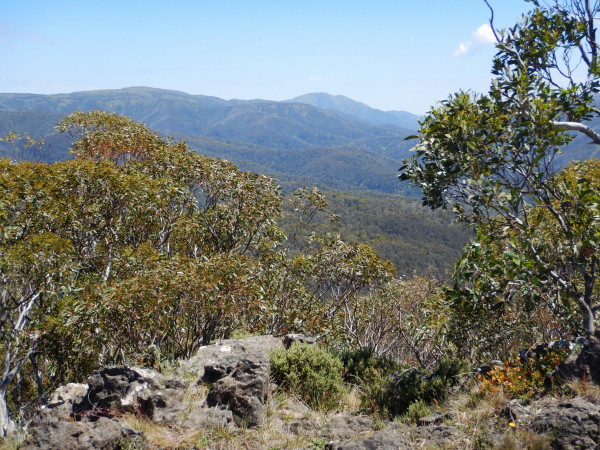
Once at the peak, take time to admire some more great views, which include Mount Cobbler, The Twins, Mount Buffalo and Mount Feathertop.
The return route is by retracing your steps back to the bitumen.
Total walking time is about 90 minutes, and is best tackled with formal walking shoes; trekking poles are also highly recommended.
As the route of this walk makes use of a 4wd bushtrack, it is wise to avoid weekends, and busy holiday periods.
[For some more exercise, continue on from the Mount, so as to reach the site of Gunns Hut, a further three kilometres away, making this a 10km variation of the basic 4km walk. See the Spatial Vision map Bogong Alpine Area for more details.]
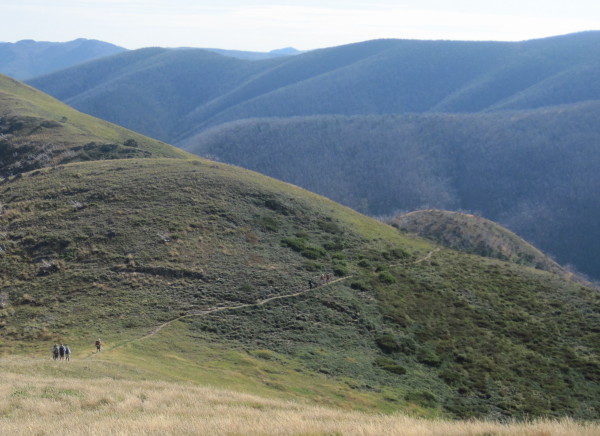
The Twins [AWTGS-4]
The Twins are an isolated set of high peaks, and offer a very enjoyable 10km loop to/from the GAR, with access via the junction of the GAR and the Dargo High Plains Road.
There is a limited amount of parking at this intersection, and the safest option is to park on the Dargo Road, rather than the GAR.
The best map for the walk is the Spatial Vision Bogong Alpine Area, and with this, and plenty of food and water, as well as a set of formal walking shoes/boots and a set of trekking poles, it's time to make a move.
The walk initially makes use of the roadway of the 4wd track (known as The Twins Track) that leads over to the Buckland Valley, and for this reason (for the outgoing section of the walk, and the last two kilometres of the return) you need to be on the lookout for the occasional 4wd vehicle/trail bike.
Having parked your vehicle within the first few hundred metres of the Dargo Road, the entry to the Twins Track will have been spotted, off to the west, and this needs to be followed for about four kilometres, to where the footpad to The Twins heads off to the south-east.
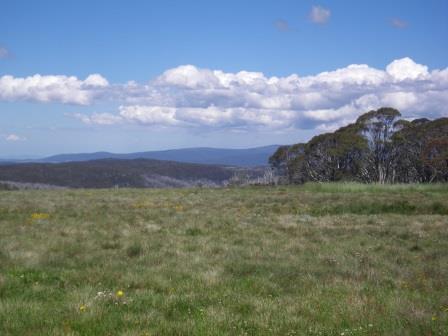
This now leads onwards, and upwards, through alpine grasslands to The Twins, and some great views of the surrounding high country.
Once at the peak of The Twins, you will have encountered the AAWT, and to complete the walk, you now need to swing to the east, and follow this famous walking track down towards the Twins Track, from where you will have about two kilometres to get back to the start.
There is little signage on this walk, and you will need to follow the map carefully, preferably with the aid of a GPS.
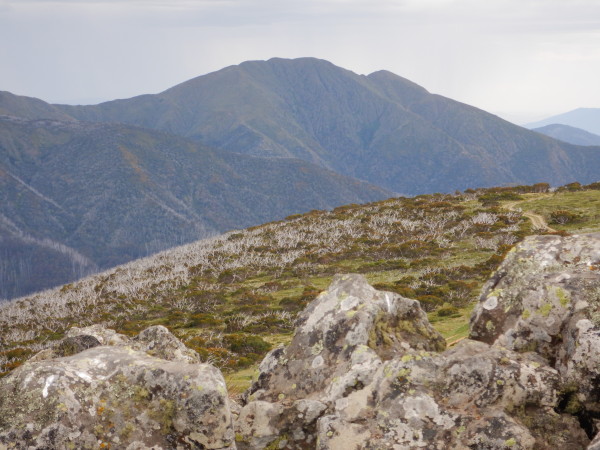
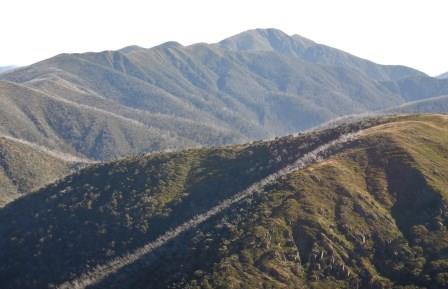
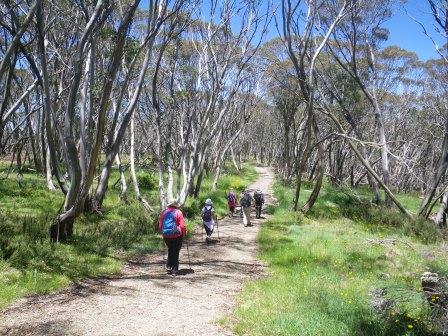
The Razorback and Mount Feathertop [AWTGS-4]
Mount Feathertop, at 1922m, is the second highest peak in Victoria, and the second highest in the Alpine National Park. The feathery wind-driven plumes of powder-snow that often drift from its abrupt peak gave the mountain its name, and although sounding quite nice and innocent, this mountain, like any other, deserves respect. This is a long walk (about 26km all up) in alpine conditions, and it is best to start early in the morning, allowing at least eight hours for this great adventure.
Snow is not unknown in any month of the year, however November to April usually have little likelihood of snow; but even so, be prepared for a change in the weather. Old-timers of the high country used to talk about the big falls of December 1939, which gave perfect skiing on Christmas Day of that year.
Recommended maps include Spatial Vision Bogong Alpine Area, the VicMap 1:50 000 sheet Falls Creek and Rooftop Maps Bright - Bogong - Hotham Forest Activities Map. We also used a Garmin GPS to record distances/waypoints.
To get to the Razorback, drive to the Diamantina Hut area on the Great Alpine Road, park the hardware, and walk over to the information shelter, taking time to inspect the memorial to Norwegian Eric Gravbrot, a pioneer of this area.
After signing the walk register, walk northwards to the Bon Accord Spur. This leads down to the Big Dipper, a saddle where there are impressive areas of snowgum woodlands, and some great walking terrain.
The track now climbs over the Twin Knobs, and skirts High Knob, eventually coming across the Molly Hill Memorial Cairn (up on the right) just before the Bungalow Spur Track (Molly Hill was a skier who lost her life here in 1932).
Federation Hut is just down the slope from here, and is a favourite location for that well earned lunch.
If you still have some spare energy, the summit of Mount Feathertop (which is clearly visible) is about 1500m away.
Having enjoyed some amazing scenery, the return route is by retracing your weary steps back to the GAR.
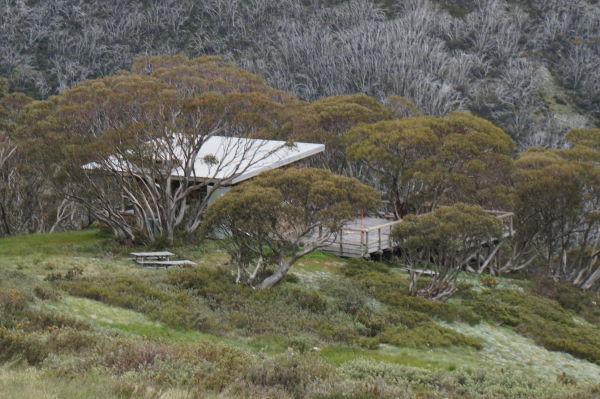
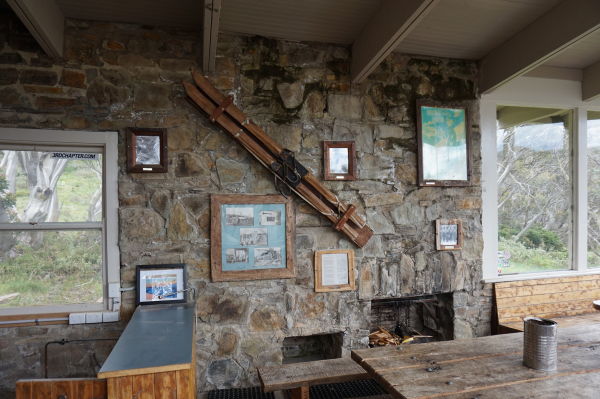
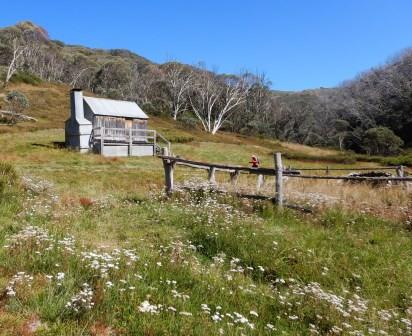
Joyce Brockhoff Hut [AWTGS-4]
This is a pleasing alpine cabin, not far from the centre of the Hotham Heights Village, and was erected by the Australian Womens Ski Club (AWSC) to commemorate the life of Joyce Brockhoff, a leading Victorian skier.
Joyce was also a member of the well known family of biscuit manufacturers. Her great-grandfather, Adolph Brokhoff, migrated to Australia from Mecklenburg, Germany, and started the biscuit-manufacturing firm A F Brockhoff in 1880.
This was a very successful venture, and eventually merged with other companies (in 1966) as part of the Arnotts Biscuits conglomerate.
Brockhoff joined the Ski Club of Victoria in 1929, was a foundation member of the AWSC, and won many competitions during the 1930s.
Joyce died in May 1947, and the Hut was built (mostly in stone) in 1949 as a memorial to her life, and her achievements.
By 1990, the Hut had fallen in to disrepair, but was saved by the efforts of the Alpine Club of Victoria, and the Hotham Ski Club, who organised the necessary repairs.
The Hut is located amongst snowgums, on a small spur between the Heavenly Valley at Gotcha Chairlifts, and makes an interesting bushwalk, with great scenery, and some alpine history.
The access route starts at the Loch Car Park, and from here you need to keep left (that is, north) of the Reservoir, and step it out for about a kilometre, before hanging a right at the HW09 emergency marker.
From here, follow the ski piste downhill, and the Hut soon comes into view.
For GPS users, the relevant data at the Hut is 36.973929 : 147.122595
As there is no formal track to the Hut, there is no need to follow this information exactly, but this blurb will help you find the Hut easily.
Allow about 90 minutes for the return journey, longer if you want to read all about a very interesting era in Victoria’s ski-ing history.
See also the entry in the MonumentAustralia website (monumentaustralia.org.au) for more details of the Hut, and more history.
The walk is rated AWTGS-4 because of the lack of signage.
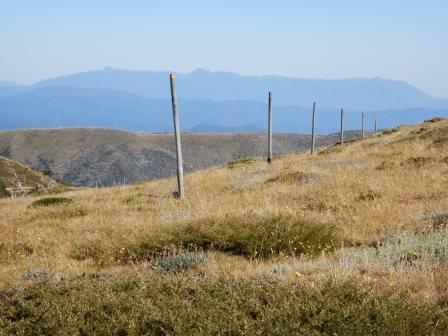
Mount Loch [AWTGS-3]
Mount Loch is a notable basalt capped peak of the high country around Mount Hotham, and is located about four kilometres from the GAR.
The action starts by parking at the Mount Loch Reservoir (on the left, just before Mount Hotham Vilage) where there is a huge car park, as well as an information board.
Having taken time to admire the great views of Mount Buffalo, The Razorback and Mount Feathertop, as well as the Flame Robin sculpture, it’s time to hit the trail.
From the sculpture, the route follows a ridge for several kilometres, past a memorial obelisk to Charles Derrick (on the right at 1.4km; see next description) before keeping north-ish at the Mount Loch/Derrick Hut turn-off, about 2.8km from the start.
Follow the roadway for about 500m, where there is a signpost pointing to the summit of Mount Loch, about 200m away at this point.
A meandering pathway now leads to the summit, where there is a stone cairn, and some great views of Mount Feathertop and (to the left) The Razorback and (to the right) the remote valley of the West Kiewa River.
The return route is by retracing your steps, making an overall journey of about eight kilometres.
Given the exposed, high level, nature of this walk, pick a fine day for your adventure.
[During the last five hundred metres of the access roadway up towards (and back from) Mount Loch there are nice views of the basalt columns that form this section of high ground, as well as the detritus from the weathering of these columns.]
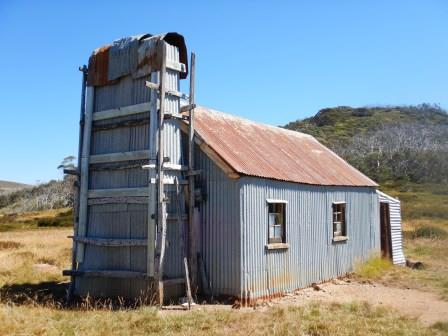
Derrick Hut [AWTGS-4]
The Derrick Memorial Hut was built in memory of skier Charles Derrick, who died on a ski adventure from Mount Bogong to Mount Hotham in 1965.
The Hut is located in a snowgum woodland, and makes a nice destination for a half-day walk of about six kilometres each way (total 12km).
The action starts by parking at the Mount Loch Reservoir (on the left, just before Mount Hotham Vilage) where there is a huge car park, as well as an information board. Useful snippets here include the fact that today's walk is entirely on a section of the Australian Alpine Walking Track (AAWT; see the link below for more details of the guide book).
Having taken time to admire the great views of Mount Buffalo, The Razorback and Mount Feathertop, as well as the Flame Robin sculpture, it’s time to hit the trail.
From the sculpture, the route follows a ridge for several kilometres, past a memorial obelisk to Derrick (on the right at 1.4km), before swinging over to the east (right), at the Mount Loch (1865m) turn-off, about 2.8km from the start.
Take care to ignore the sign-post (at 3.5km) that indicates ‘Spargos’ to the diagonal right; keep left at this sign-post, following the footpad as before (the route sign-posted as ‘Spargos’ is a ski trail that leads down the valley to the base station of the Heavenly Valley Chair).
The route now leads through the snowgums to another intersection (3.8km), with the straight-ahead option at this point leading to Spargos Hut (see separate description below), and the left turn (our route) leading to Derrick Hut.
Once at the Hut there is plenty of interest, including details of Charles Derrick’s misadventure.
The return from the Hut to the start of the walk is by retracing your steps exactly.
Dibbins Hut [AWTGS-4]
Dibbins Hut was built in about 1917, by the family of Arthur Dibbins; Arthur first took cattle to the high country in the 1890s, and was one of the pioneers of documenting this area.
The Hut is located down in the scenic valley of the Cobungra River, and offers a full day's "there-and-back" walk of about 16km in total.
The walk to Dibbins Hut initially leads out to the Derrick Memorial Hut, and some of the description of the walk to that hut is repeated here.
The action starts by parking at the Mount Loch Reservoir (on the left, just before Mount Hotham Vilage) where there is a huge car park, as well as an information board. Useful snippets here include the fact that today's walk is entirely on a section of the Australian Alpine Walking Track (AAWT; see the link below for more details of the guide book).
Having taken time to admire the great views of Mount Buffalo, The Razorback and Mount Feathertop, as well as the Flame Robin sculpture, it’s time to hit the trail.
From the sculpture, the route follows a ridge for several kilometres, past a memorial obelisk to Derrick (on the right at 1.4km), before swinging over to the east (right), at the Mount Loch (1865m) turn-off, about 2.8km from the start.
Take care to ignore the sign-post (at 3.5km) that indicates ‘Spargos’ to the diagonal right; keep left at this sign-post, following the footpad as before (the route sign-posted as ‘Spargos’ is a ski trail that leads down the valley to the base station of the Heavenly Valley Chair).
The route now leads through the snowgums to another intersection (3.8km), with the straight-ahead option at this point leading to Spargos Hut (see separate description below), and the left turn (our route) leading to Derrick Hut.
Once at the Hut there is plenty of interest, including details of Charles Derrick’s misadventure.
Continuing on, the AAWT follows an undulating ridgeline system that heads steadily north-east.
After about three kilometres, the route starts a steep descent down to the environs of Dibbins Hut, and the Cobungra River.
The setting for the hut is very scenic, nicley located on the river flats of the Cobungra, a major tributary of the Mitta Mitta River.
Having enjoyed this great location, it’s time to face the inevitable, the climb back up to the ridgeline, the return route being by retracing your steps exactly.
Spargos Hut [AWTGS-5]
Spargos Hut was built by gold prospector Bill Spargo in about 1928. Bill worked, on what is now the GAR, for the Country Roads Board, and also had gold mining interests in the Hotham area, discovering the Red Robin Reef on Machinery Spur in 1940.
Spargo was also very influential in guiding the establishment of Mount Hotham as a ski resort.
There is a memorial to Bill on the GAR, on the north side of the bitumen, about 250m before the General Store.
The distances given here are from the information board at the Loch car park, and can be used in conjunction with the GPS data shown at the end of this description.
This is a walk for fit, and experienced bushwalkers, requiring a good sense of direction, a GPS, formal walking shoes, trekking poles, and good stash of food, and at least 2.5 litres of water per person.
The walk, as described covers about 14km of mixed terrain types, however this total does not include the three kilometre return walk along the GAR to get back to the start; ideally your group will have at least two vehicles, and complete a car shuttle along the GAR prior to setting off.
Recommended map, Rooftop Maps Bright - Bogong - Hotham Forest Activities Map. We also used a Garmin GPS, with topo maps, to record distances/waypoints.
The action starts by parking at the Mount Loch Reservoir (on the left, just before Mount Hotham Vilage) where there is a large car park, as well as an information board.
Having taken time to admire the great views of Mount Buffalo, The Razorback and Mount Feathertop, as well as the Flame Robin sculpture, it’s time to hit the trail.
From the sculpture, the route follows a ridge for several kilometres, past a memorial obelisk to Derrick (on the right at 1.4km), dropping down to Derrick Col, before swinging over to the east (right), at the Mount Loch (1865m) turn-off, about 2.8km from the start.
Take care to ignore the sign-post (at 3.5km) that indicates ‘Spargos’ to the diagonal right; keep left at this sign-post, following the footpad as before (the route sign-posted as ‘Spargos’ is a ski trail that leads down the valley to the base station of the Heavenly Valley Chair).
Most maps of this area say that it is trackless; however, it is there, albeit vague in places. Importantly, you need to remember that this is a ridgeline walk, and that if you drift away too far from the spine of the ridge (and/or initially too far to the left, or right, of those orange poles), you have problems.
After a few hundred metres, leaving the orange ski poles behind (to your right) the footpad now leads over a rise to a saddle, the centre of which is about 4.5km from the start.
Keeping a reasonably straight line through the saddle, there is another rise (Golden Point) where the footpad meanders extensively, but eventually provides your first view of Spargos Hut, located in Golden Spur Saddle.
This is about 5.7km from the start, and is a good place for lunch/morning tea, albeit without any seating (other than inside the Hut).
Continuing on from the Hut, the footpad crosses the Saddle, climbs another rise, and soon begins a relentless, single-file, descent to Swindlers Creek. This is a well engineered footpad, but it is very tiring, and you need to pay careful attention as to where you are placing your feet.
Just before the Creek (7.25km from the start) there is a welcome (albeit small) bench on the right, making this a good place to take a long break, and (if necessary) replenish some of your water bottles in the Creek.
If you look upstream of the bridge, there is an example of columnar basalt, not far below the surface of the scenic Swindlers Creek.
Geological structures of this kind are usually found in the vertical, but this one in the horizontal, but still shows the remarkably straight cooling lines that typifies columnar basalt
The route (still single-file) crosses over the Creek (via a bridge) and now makes a relentless climb up to the Cobungra Ditch walking track (about 800m away), where you need to swing right.
There is another bench here, and this is also a good place to take a breather.
The walking track now has a nice easy gradient, and there is plenty to see of the engineering of the Cobungra Ditch, as well as several very informative story boards (see the separate description for the history etc of the Ditch).
The Ditch is also home to some snakes, and you need to take care to observe the footpad in front of you, particularly in the moist areas.
Edelweiss Track is encountered (on the left; see below) at 8.7km, and this is soon followed by a very scenic waterfall on Skeleton Creek (at 9km), with a park bench just before the Falls, and one just after.
If you take the latter bench, there is a nice view (directly over the Creek) of some more columnar basalt.
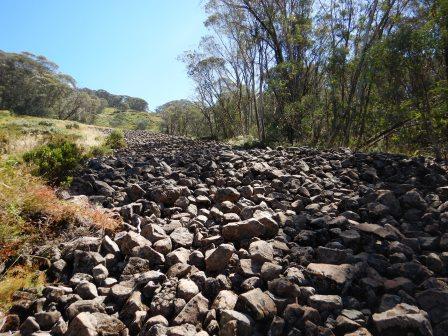
The next item of interest is a huge basalt lava flow, one of several in this area, and one of many in Victoria's high country.
Basalt has a relatively high water content, and (unlike granite etc which are mountain builders) forms vast areas of undulating high plains (such as the Dargo High Plains, and the Bogong High Plains, in Victoria, as well as the New England Plateau in NSW, and the Atherton Tablelands in North Queensland).
This particular lava flow (also known as a basalt scree slope) is very interesting in that wave forms can be seen in the basalt; these were created as the fluid lava flow cascaded down the hillslope.
This last landmark leads to a short flight of ‘stairs’ (at 9.5km) that leads up to the Davenport Access Track.
Turning left at the top of the stairs then leads for 1.45km to the GAR, and the environs of Hotham Village.
This last section is on a maintenance vehicle track, and is not particularly steep, but after having made it to here from the Loch Car Park, it is quite tiring.
If you have the energy on the way to the bitumen, you might want to admire the view from the top of the scree slope previously mentioned.
[Edelweiss offers a short-cut back up to the GAR, but is relentlessly steep, the price to pay for cutting about two kilometres off the walk.]
| Location | Distance | GPS |
| Loch Car Park | 0.0km | GPS : 36/58.4524 : 147/08.2689 |
| Derrick Cairn | 1.4km | GPS 36/57.682 : 147/09.201 |
| Mt Loch turn-off | 2.8km | GPS 36/58.004 : 147/09.390 |
| Sign-post | 3.5km | GPS 36/58.157 : 147/09.453 |
| Derrick Hut t/o | 3.8km | GPS 36/58.497 : 147/09.446 |
| Saddle | 4.5km | GPS 36/58.911 : 147/09.781 |
| Spargos Hut | 5.7km | GPS 36/59.339 : 147/09.877 |
| Swindlers Creek | 7.35km | GPS 36/59.398 : 147/09.725 |
| Cobungra Ditch | 8.10km | GPS 36/59.317 : 147/09.408 |
| Edelweiss Track | 8.7km | GPS 36/59.369 : 147/09.203 |
| Davenport Access Track | 9.85km | GPS 36/59.044 : 147/09.146 |
| GAR | 11.3km | GPS 36/59.566 : 147/09.277 |
The Huts Walk [AWTGS-5]
This is a major walking route promoted by Mount Hotham Alpine Resort Management Board, and makes a wide loop through the ridge country immediately to the north of the Resort, incorporating Derrick Hut, Spargos Hut and the Silver Brumby Hut.
The main structure of this walk is described in our Spargos Hut Walk (see above); to incorporate Derrick Hut, and the Silver Brumby Hut, you will need to refer to the Spargos Hut Walk, the Derrick Hut Walk (see above) and the Silver Brumby Hut Walk (see below).
There is a description of the full walk, and a basic map, available in the brochure Mount Hotham and Dinner Plain Tracks and Trails. See the Mount Hotham or Dinner Plain websites (links below) for more info.
Silver Brumby [AWTGS-3]
The Silver Brumby Hut was built in 1992 as a temporary film prop for the Australian film “The Silver Brumby”, based on the novel by Elyne Mitchell. However, the present hut (a replica of the original) is a complete rebuild of the original, dating from a project in 2007 that was co-ordinated by Victorian High Country Huts Association (VHCHA) members.
Elyne Mitchell (nee Chauvel) was the daughter of General Sir Henry George Chauvel, the commander of the ANZAC Mounted Division Light Horse and Desert Mounted Corps in WW1, famous for its charge at Beersheba.
Elyne married Thomas Mitchell in 1935, and set up home with him in Corryong, where she became a keen skier and horserider.
The Silver Brumby was part of a series of children's books, all of them set in the Snowy Mountains; the movie was made in 1993, with Caroline Goodall as Mitchell, and Russell Crowe as The Man.
The Hut is located in an area known as the Plains of Heaven, not far from the Village, and is in the upper reaches of Swindlers Creek, making it an ideal half-day walk, with lunch included.
The walk starts by taking the Davenport Access Track from the GAR (just at the southern edge of the Village); there is a linear car park nearby, but if you are staying in the Village, it is only a short stroll away.
Follow the Davenport Track for a bit short of 1.5km, and then keep straight-ahead at the Cobungra Ditch Track stairway (off to the right), for a further 1.5km to the Hut. There is an abrupt hairpin on this final section, and you basically follow Swindlers Creek downstream all the way to the Hut.
There is a water treatment plant as you make swing around the hairpin, alongside a small weir on the creek.
The signage at this point says Silver Brumby Hut 900m, however our GPS says that it is 1100m away.
Regardless, this is a nice stroll, with the Creek to your left most of the way to the base station of the Blue Ribbon ski-lift.
From here, you need to follow the vehicular track that sweeps around just after the ski-lift, and this will lead you to the riverine flats that are home to the Silver Brumby Hut.
The return is via the exact same route, and the overall walking time is about two hours, with the six kilometre route including some extended gradients.
[Some walkers include this walk as a detour from The Huts Walk - see the separate description for more details.
Also, see hutsvictoria.org.au or khuts.org for a photo of the dilapidated original hut.]
Mount Higginbotham [AWTGS-3]
This small peak is located just to the south-west of the Mount Hotham Village, and has an enjoyable, summertime only, walking trail.
Access is usually via the Corral Car Park (the car park adjoining the Information Centre), and from here you need to keep to the left of the Medical Centre, and take the second track leading off to the right. This leads past some ski lodges, to some open sloping ground to the rear of the Mink Lodge.
From here a green information bollard is clearly visible, and this marks the start of the walking track, shown on most maps as Higgi Trail.
The footpad is steep, and winds its way through the snowgums to a memorial to skier Lindsay Salmon.
There are great views from here, as well as the memorial plaque to read.
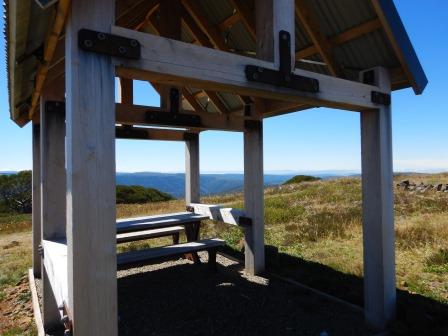
Continuing past the memorial, the track leads over the summit to the perfect picnic shelter - having amazing views in all directions.
From here, follow the vehicular track as it meanders its way down to the southern side of the Village, meeting up with the GAR just near the General Store, and its excellent cafe.
The return to the starting point is either via the GAR (take care) or via Higgi Drive, the partially sealed roadway that runs behind the Arlberg Hotel.
Allow at least an hour for the complete four kilometre loop, longer if you want to linger over the views at the cafe.
Falls to Hotham Alpine Crossing [AWTGS-4]
The Falls Creek to Hotham Alpine Crossing, also known as Falls - Hotham Alpine Crossing (FHAC), is a 38.5km (one way) walk, and takes about three days from end-to-end.
There are two campsites; Cope Hut campsite, set amongst snowgums on the Bogong High Plains, 14km from the trailhead and usually the first night’s campsite; Dibbins Hut campsite, on a snow plain in the headwaters of the Cobungra River, about 30km from Falls Creek (that is, about nine kilometres from the Mount Loch car park, a few kilometres north of Mount Hotham)
Each campsite has five sites, four of which have a formal tent platform that is designed to fit a 2-3 person hiking tent, and a larger platform for small groups/larger tent.
At Falls Creek the trail starts from the Heathy Spur carpark, on the eastern side of the Rocky Valley Dam Wall. This is about three kilometres from the Falls Creek Information Centre by road, or you can walk from the village bowl, mostly via formal off-road tracks. At Mount Hotham, the trail finishes at the Mt Loch carpark, just off the Great Alpine Road, a few kilometres north of Mount Hotham.
Some data : Total distance: 38.5km; highest point 1832m; lowest point 1351m; total ascent 1400m; total descent 1190m.
There are several websites that cover the walk in more detail than given here, and most of these offer a downloadable GPX file with all of the crucial GPS waypoints.
See the link below for the official website to this walk.
Falls to Hotham Alpine Crossing
Brabralung Trail [AWTGS-4]
The Brabralung Trail links Dinner Plain with Mount Hotham, and is an enjoyable (albeit, hard) 12km adventure, taking about four hours to complete. This excellent trail meanders through the snowgums, with many interesting features, and optional detours.
There are carparks at both ends, and intermediate access points, so if you don’t want to walk a 24km loop, you can just organise a car shuttle, and complete a shorter outing.
A detailed map, with lot of other handy information, is available on the Trail PDF, accessible from either the Hotham or Dinner Plain websites (see links below).
If you take some of the detours, then the one-way walk extends out to 18km+, and makes for a full day's outing.
Tradition has it that that the walk starts off with a capuccino at the Hotham General Store and Cafe, and from here the walking track heads off to the south, towards Dinner Plain.
The General Store has a popular elevated patio, with great views of the surrounding range country, as well as an expert team of barriste, and barristi.
The first part of the Trail meanders through the eastern edge of the Mount Hotham Resort, before venturing out to the snowgum woodlands, and the first of three crossings of the GAR.
Take care at the crossing, and then keep an eye out to the left (north) for the first of the detours. Many people take a short loop to the Christmas Hills Lookout (signposted), and then return to Brabralung via Woodlands Trail. This adds about two kilometres to the journey.
Descending back to Brabralung (via Woodlands Trail), hang a left at the pathway, and it is a short journey to the Bill Howard Memorial, Howards Hut amd Wire Plain.
The shelter at Wire Plain (on the opposite side of the GAR) is a convenient place to have lunch if the weather isn’t the best, and has a small toilet block about 50m to the rear.
The Trail now traverses Wire Plain, passes alongside the Biathalon Trail, and heads towards a tunnel under the GAR that is used by skiers in winter.
Keeping left as you emerge from the tunnel, the Trail continues its scenic journey towards Dinner Plain, and soon encounters Paw Paw Plain, and its elevated boardwalk (this traverses a spring-fed wet area).
A steady climb from Paw Paw Plain leads past JB Plain, and then the final stretch to Dinner Plain.
[An alternative route to that described above involves crossing over the GAR at Howards Hut, and then tackling the Dargo Lookout Loop.
This detour leads to a rocky outcrop, with a picnic shelter, tables and chairs, with great views over the ranges towards the Dargo High Plains.
If you are confident in cross-country navigation, there is a footpad (Poldark’s Trail) leading off from the eastern side of the Loop that picks up Brabralung Trail immediately to the south of the skiers tunnel mentioned above.
Otherwise, you will need to return to Howards Hut after the detour, so as to pick up the Trail where you left it.
Possum Flat Loop adjoins the Dargo Lookout Loop, and also covers about 2.5km; it branches off from the Dargo Lookout not far from the GAR.]
Dead Timber Hill [AWTGS-3]
This is a popular short walk with people who stay at Dinner Plain for a few days, as well as drivers looking for a short walk during their transit along the GAR.
If you start from the bitumen of the GAR, then the route designated as Dead Timber Hill is just over two kilometres in length, but it’s easy to make this into a four kilometre loop from the centre of Dinner Plain Village.
So, starting out from the Village Square, head east (towards the playground) and then pick up the gravel path that leads to the bitumen of the GAR, and cross over at this point to the sign boards that announce the start of the Montane Loop, the Montane Trail, Room with a View and the Dead Timber Hill Trail.
Ignore the Montane options, and keep left at the signpost so as to pass close to small billabong. At the top right-hand corner of this interesting feature the signage points straight-ahead to Room with a View, whereas our route heads off to the left at this point.
A large signboard almost blocks the trail here, but the faint footpad skirts around to the left of this, and from here the route curves around to the right for a gentle climb into the snowgums.
Keep following the footpad, all the way to a spectacular lookout to the north, incorporating Mount Feathertop, the upper reaches of the West Kiewa River, Mount Loch and Mount Hotham Resort.
There is a steep, and rocky section, a few hundred metres before the Lookout, but nothing too strenuous. The Lookout itself is located on a steep cliff of granitic rock, and it is prudent to stay well back from the lip of this.
A bench seat at the Lookout provides a great opportunity to have a snack and a drink, before beginning the enjoyable descent back to the GAR at J B Plain.
Cross over the bitumen of the GAR, and pick the return trail to Dinner Plain (off to the left); this being part of the Brabralung Trail that leads from Mount Hotham to Dinner Plain.
There are toilets at J B Plain, as well as a small camping area, and from here it is about two kilometres back to the environs of Dinner Plain.
Allow about two hours for the complete loop, as this will give you plenty of time to loiter at the Lookout.
Cobungra River [AWTGS-3]
This is a four kilometre descent to the picturesque Cobungra River, followed by a four kilometre ascent back to the GAR. The walk is signposted on the left of the roadway, about five kilometres before Dinner Plain. The signage mainly refers to the walk known as Cobungra Ditch (see below) but also leads down to the River.
Having parked your vehicle, follow the signs for the Cobungra Ditch, until you come to a signpost indicating that the Ditch Walk is off to the left.
Keeping straight-ahead at this point, and meandering through very enjoyable snowgum woodlands, the former Brandy Creek gold mine appears on the right, and is well worth a short detour. All that is left of the mine is an array of mullock heaps, and some mining pits, which now form a mini-wetland.
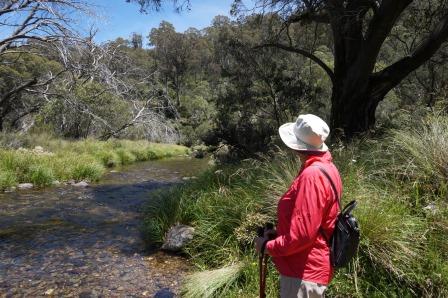
Continuing on the undulating trail, the gradient steepens in the last kilometre, and this leads to a very scenic area of river flats alongside the Cobungra River (a major tributary of the Mitta Mitta River).
After enjoying lunch on the river flats, and admiring the babbling brook that is the Cobungra, it’s time to face the music, and start the ascent back to the GAR.
We normally take about three hours (all up) for this walk, and it’s best to choose a reasonably cool day (less than 24c) for this adventure.
Cobungra Ditch [AWTGS-4]
The Cobungra Ditch was constructed during the gold mining era, and is an artificial waterway that provided a source of water for gold mining operations.
The Ditch is a very interesting feature, and there are many very informative story boards en route, making this a very enjoyable walk; it is also home to some snakes, and you need to take care to observe the footpad in front of you, particularly in the moist areas.
End-to-end, the Ditch is about 10.5km long, however for the full walk, you need to add 1.45km for the access (at Hotham) and a further 500m for the egress (at Dinner Plain).
The walk starts by taking the Davenport Access Track from the GAR (just at the southern edge of the Village); there is a linear car park nearby, but if you are staying in the Village, it is only a short stroll away.
Follow the Davenport Track for a bit short of 1.5km, and then take the Cobungra Ditch Track stairway (off to the right), for about twenty metres, to where the Cobungra Ditch Walk starts.
From the base of the stairway it is about 12km to reach the southern end of the walk near the Brandy Creek Mine, and to return to the start, you either need to arrange a car shuffle, or walk back along the GAR, making a total journey of about 18km.
The first item of interest from the stairway is a huge basalt lava flow, one of several in this area, and one of many in Victoria's high country.
Basalt has a relatively high water content, and (unlike granite etc which are mountain builders) forms vast areas of undulating high plains (such as the Dargo high Plains and the Bogong High Plains in Victoria, as well as the New England Plateau in NSW, and the Atherton Tablelands in North Queensland).
This particular lava flow (also known as a basalt scree slope) is very interesting in that wave forms can be seen in the basalt; these were created as the fluid lava flow cascaded down the hillslope. It is also of interest, in that this item of local geology (and others like it) provided much of the raw material for the Ditch.
The next item of interest is the very scenic waterfall on Skeleton Creek, with a park bench just before the Falls, and one just after.
If you take the first bench, there is a nice view (directly over the Creek) of some columnar basalt.
Geological structures of this kind are usually found in the vertical, and show the remarkably straight cooling lines that typifies columnar basalt.
Edelweiss Track is encountered (on the right) at 3.1km, and from here it is about 750m to the track coming up from Swindlers Creek (see Spargos Hut Walk). There is a nice bench here, and this makes a good locale for a quick break.
The track now starts to make its broad swing around The Big Spur, and it is about 2.5km to the West Access Track, the track that drops down to the Ditch from the Spur.
From here, there is a traverse of the base of the northern side of the Spur, meeting up with the East Access Track after a further 1.7km.
The Ditch now completes its convoluted loop of The Big Spur, and it is about 1.7km to the footbridge over Murphys Creek.
The final stretch of the Ditch (about 2.1km) leads to the Brandy Creek Access Track, and from here (by swinging right at this junction) it is about 500m to the GAR.
There is a map of the walking track, available at most Information Centres in the Ovens Valley.
As well, there is a good description, and a map, available in the brochure Mount Hotham and Dinner Plain Tracks and Trails.
See the Mount Hotham or Dinner Plain websites (links below) for more info.
Montane Loop [AWTGS-3] and Montane Walk [AWTGS-4]
This pair of walks offer easy walking through snowgum woodlands, with the option of the one kilometre loop, or a medley of longer sections that make a big loop (of about 10km) around Dinner Plain Village.
The initial access to the walk is just to the south of the main entrance to Dinner Plain Village, alongside the signage that points to the Montane Loop, the Montane Walk and the walk known as Room with a View.
The first part of the walk (that is, either the Loop itself, or the longer walk) is sign-posted off to the right, and leads straight into the much talked about snowgum woodlands, with an easy pathway leading ahead.
After about 500m there is a sign-posted track leading off to the right, this being the longer walk, whilst keeping left leads to the second half of the Loop Walk.
The Loop route then meets up with the track that leads to Room with a View (where you need to keep left), and from here it is about 100m back to the GAR.
If you are attempting the longer (that is, full) Montane Walk then the right turn (as mentioned above) leads for a little under three kilometres to a locality on the GAR known as Slippery Pinch. This is a narrow, single-file track, with many undulating sections.
Once at the GAR, you need to make a slight dog-leg (to the left) picking up the next segment via a small gate.
Take care as you drop down to the gate, as there is an abandoned vehicular track between you and the gate. The track has quite deep wheel ruts, and is a distinct hazard to pedestrians.
Having passed through the gate, the single file track continues through to Dinner Plain Track, covering a further 3.2km.
Highlights on the way include some amazing alpine meadows, and a boardwalk crossing of the Victoria River (a tributary of the Cobungra River).
The river is quite narrow at this point, but the boardwalk does guide you through a wet area.
Once at Dinner Plain Track, turn right, and start the return journey back towards the Village, with about 2.6km still to go.
During this section you need to be on the lookout for the occasional 4wd vehicle using this roadway to access the Upper Victoria River Valley, and the Wentworth River.
Overall, this longer walk (that is, the Montane Walk) takes at least three hours, and is a highlight of the walks on offer in the Dinner Plain area.
A PDF on both of these walks is available on the Mount Hotham and Dinner Plain websites - see the links below.
Bentley Plains
The Bentley Plains are located to the east of the GAR, with dry weather access either via the Bindi Road from north of Swifts Creek, or the Little River Road from Ensay, neither access being suited to normal sedans, large trailer combinations or motorhomes.
In either case, these roadways lead to Moscow Villa, and some nice camping areas, at Bentley Plains.

If you accessed the Villa via the Bindi Road, then there would have been some amazing views in the rear vision mirror, and you would have passed by ‘The Washington’. This is a steam powered winch from the timber getting days - an impressive winch and equally impressive overhead gantry. The winch was made in Seattle - hence the name.
The hallmark of Bentley Plains is its large expanse of snowgum woodlands, with several easy walking tracks radiating out from the Villa.
Douglas Reserve Walk [AWTGS-2] is a 500m (30 minute) short stroll, with viewing platforms and boardwalks.
Bentley Creek Walk [AWTGS-3] is a two kilometre (75min) loop, traversing grasslands and boardwalks.
Bentley Plain Walk [AWTGS-3] covers about three kilometres (taking about two hours), and is a bit more rugged terrain than the previous two walks, but is not difficult.
Details of these walks are also available in the Omeo Region Walking Tracks and Trails brochure available from Visitor Information Centres at Bright, Omeo and Bairnsdale.
Cassilis Gold Mining Area
The two main walks in this area (the Jirnkee Water Race and King Cassilis Mine) are detailed in the Omeo description - see link below.
Details are also available in the previously mentioned Omeo Region Walking Tracks and Trails brochure, available from Visitor Information Centres at Bright, Omeo and Bairnsdale.
Fairy Dell, Wiseleigh [AWTGS-3]
The Fairy Dell is located just out of the small settlement of Wiseleigh, 22km east of Bairnsdale, and hides a little known remnant of rainforest, offering a very enjoyable walking track.
Access is via a well sign-posted turning off the Omeo Highway in Wiseleigh, leading to a reasonably well-surfaced forestry road (Fairy Dell Road).
A car parking area is reached after six kilometres and from here a walking track loop leads off into the forest. There are day visitor amenities at the car park, including a supply of drinking water, making this a good stepping off point for a walk.
The track to Fairy Dell (a small knoll in the forest) is sign-posted from the car park, and offers the choice of two routes, the low road and the high road, both of which lead to the same point.
When you get to the first intersection on the track, keep right for the low road, left for the high road. Both routes are well graded, however the high road does involve a steepish climb over a small rise, whereas the low road follows the gully.
Where the two routes recombine the track continues its lazy meander through the forest, leading to a small knoll overlooking a pristine area of rainforest.
There are some small benches at the Dell, so there’s plenty of opportunity to sit and admire the sights, sounds and fragrances of the forest before retracing your steps.
Bairnsdale’s Riverside Walking Path [AWTGS-2]
This excellent walkway follows the Mitchell River upstream from the downtown area, and there are several access points to the walking track, the easiest of which is adjacent to the riverside caravan park.
From here, the walkway follows the lovely Mitchell River to the Lind Bridge, where it is easy to cross over to the opposite bank, and follow the Mitchell downstream, back towards the city centre.
The walk actually finishes on the eastern side of the main Mitchell River Bridge (near the memorial to Angus McMillan) and from here you need to re-cross the River to get back to the starting point.
This is a very enjoyable (and popular) six kilometre (two hour) walk, with many great views of the Mitchell, its swing terraces, and its riverine vegetation. Much of the downtown area is built on a swing terrace, as are most of the new housing estates on the opposite side of the Mitchell.
If you have some more time, don’t cross over the River at the Lind Bridge, but stay on the same side of the Mitchell, and continue through to Picnic Point. This adds another scenic four kilometres to the walk (that is, making a total of about 10km, three hours), and you then need to retrace your steps to the Lind Bridge to return to the start of the walk.
Alternative access to the start of the walk is to take Bailey Street (from Main Street) down towards the River, and then the signposted curving walking track that leads down to the Mitchell.
Australian Alps Walking Track guide book
OMEO (includes Oriental Claims Historic Area and Justice Precinct)
Omeo Visitor Information Centre
COPYRIGHT © 1995-2022, Chris McLaughlin.