CHILTERN - MOUNT PILOT NATIONAL PARK
(www.northeastvictoria.online)
Chiltern - Mount Pilot National Park (21600ha) incorporates several historic sites from the mining era, and its superb box-ironbark forest is a major remnant of this once widespread woodland type.
The Park covers a wide area of interesting terrain, from north of Chiltern township it reaches almost to Beechworth, and as well as being a safe haven for flora and fauna, is also home to many aspects of the North-east’s human history.
The Park’s distinctive vegetation includes red gum, red box and white box on the higher, dry and rocky ground of the park, and red stringybark, grey box and red ironbark on the more fertile lower areas. A renowned spring wildflower display includes lilies, orchids, and bush peas.
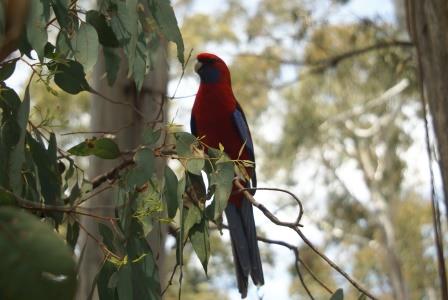
Many species of birds, including rare Regent Honeyeaters and Turquoise Parrots, have been recorded in the park. Late winter and early spring are usually the best times for observing birds, as the ironbarks and wildflowers are in full bloom at this time.
Eastern Grey Kangaroos can be seen grazing in woodland areas and in the early evening Brushtail and Ringtail Possums are reasonably common. These nocturnal animals generally live in the southern parts of the park where tree hollows are more plentiful than elsewhere (the forest is more mature in this area).
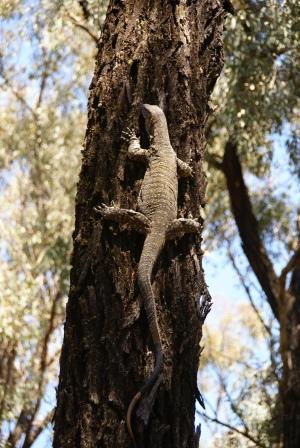
Other wildlife includes a variety of tree-dwelling mammals such as the Squirrel Glider, Sugar Glider and Feathertail Glider and goannas. More details are available on the Parks Victoria website (see below) and at www.friendsofchiltern.org.
The best way to see the Park is to drive to a particular location and then walk. If you have small children with you, keep to made tracks as there are several mine shafts, and alluvial mining scars, in the Park which haven’t been filled (many have been sealed and filled). However, so long as you take care, it is still quite safe (and very enjoyable) to walk through the forest on formed tracks.
The Park straddles the Hume Freeway, and access is by taking the Chiltern turn-off from the Freeway, or by taking the Chiltern Road out of Beechworth.
Picnic and barbeque facilities are provided at Donkey Hill, Magenta Mine, Frogs Hollow and Honeyeater (Cyanide Dam), and there are camping sites alongside Reedy Creek (southern section of the Park) and at Tuan (northern section). The Reedy Creek sites have nice ambience, whilst the Tuan campsite is more functional than attractive.
Near Mount Pilot (in Toveys Road), the Mount Pilot Tourist Farm Stay has two very comfortable ’miners’ cottages available, with a number of activities going on at the Farm (notably trail rides). Nearby townships, including Beechworth, Chiltern, Eldorado and Yackandandah also offer several accommodation options.
Cyanide Dam Walking Track [AWTGS-2]
This short (10 minute) walk loops around the Cyanide Dam water storage, and adjoins the Honeyeater Picnic Area described in the previous section (White Box Walking Track).
As the Dam is one of few reliable water sources in the Park, there is a good chance of meeting up with some wildlife whilst on this walk.
Access to the Dam is described in the previous section, and the action starts by following the signage from the Picnic Area, basically heading off in the opposite direction to the start of the White Box Track.
The route makes an anti-clockwise loop around the Dam (which formed part of the gold mining infrastructure from yesteryear) with many nice views of the water itself, and associated wetland areas.
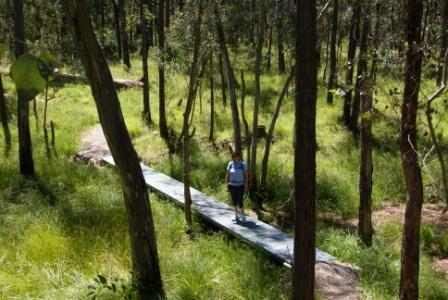
There’s a couple of boardwalks to negotiate, but apart from that, this is a straightforward walk.
Mount Barambogie
Mount Barambogie is located about 15km south-west of Chiltern, within Chiltern-Mount Pilot National Park, and stands at about 500m, surrounded by rugged granite country.
Initial access is via the Chiltern-Beechworth Road, taking Barambogie Road to the south-west
The starting point for this particular walk is about a kilometre west of the Gravel Pit Road intersection.

There is plenty of parking alongside the roadway here, and setting off on foot for this 14km (five hour) adventure, head south-west, and then swing to the south onto Bear Track.
Continue down Bear Track to the intersection with PX Track, turn right and then veer off to the south after about 300m, cutting across country towards the Mount Barambogie Road (see map).
Turn left at Mount Barambogie Road, and after about 500m take the summitt access road to the left.
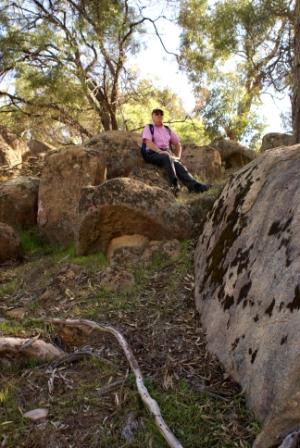
This actual ascent of Mount Barambogie leads to a great lunch spot, with superb views, as well as very comfortable seating in the rocky surrounds.
The descent from the Mount (to the north) involves some more cross-country work, and leads back down to PX Track, where a right turn is required.
An unmarked track off PX Track then leads diagonally to the north, and then north-west so as to cross a low saddle, and some interesting rock-gardens.
This is then followed by a gradual descent back to the start, via some beautiful moss gardens.
The 1:50 000 scale topographic sheet (essential gear) is ‘Albury’ (8225-N), and given the tricky navigation the walk is rated AWTGS-4; many walkers will find a set of trekking poles a useful asset.
An even better map (if you can find a copy) is the 1:25 000 sheet ‘Barambogie’ (8225-4-3).
Mount Pilot
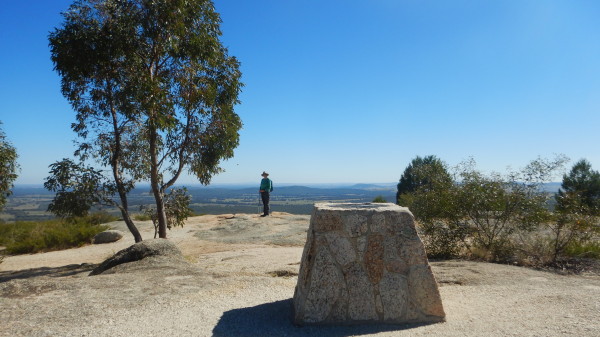
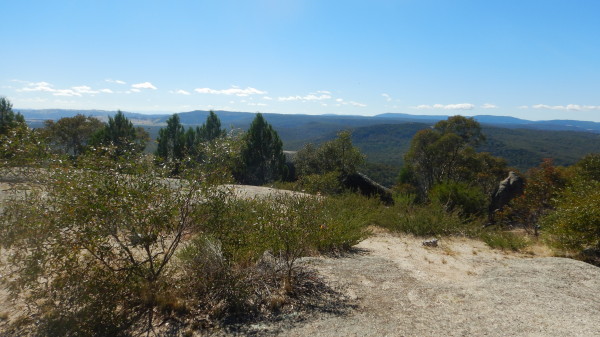
Mount Pilot (548m) has excellent 360 degree views over the surrounding ranges, and floodplains, and there are two methods to get to the Mount Pilot picnic area, by vehicle, and by walking.
Vehicular access is via the Chiltern - Beechworth Road, where a turn-off onto the Old Coach Road (14km from Chiltern, 12km from Beechworth) is signposted Mount Pilot 2.7km. Following this easy gravel run, there is a y-junction at a little over two kilometres from the bitumen, where you need to swing left to get to the Mount Pilot car park.
There is plenty of room at the car park, as well as day visitor amenities, and some great views. However, even better views will be unveiled by taking the 300m walk to the summit.
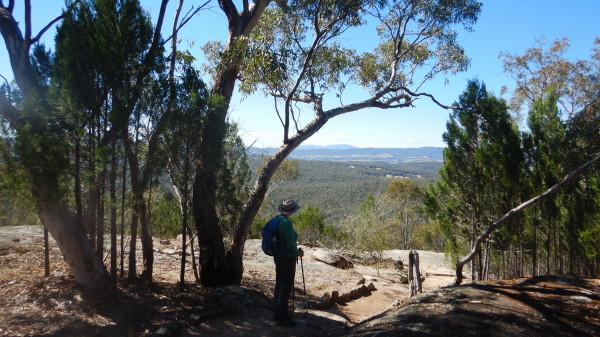
On the way up to this local highpoint, there are many great views over the surrounding bushland, including forested areas that make up the National Park, cleared pastoral country beyond this, and many notable peaks such as Mount Baranduda, and Mount Buffalo.
An obelisk near the summit points out what can be seen in which direction, and all of these views can be appreciated by wandering around the summit area. Springtime wildflower displays are also a feature of the summit area.
On foot, there are several options - a popular route is to take McGuiness Road off the Chiltern - Beechworth Road, and with reference to Rooftop Map's Beechworth - Albury - Wangaratta Adventure Map, follow this through to where Pilot Track goes off to the left.
Take care with parking your vehicle at this point, and where you place your feet on the verge, and then head north along Pilot Track.
This leads to a t-junction with the Old Coach Road (after about 2.7km), and here you need to turn right, and follow the Old Coach Road, and then the sign-posted access track, through to the picnic area.
The return route is by returning to the Old Coach Road, and taking the eastern continuation of this road, through to where it meets up with McGuiness Road.
Turn right (that is, south) at this point, and it is now about two kilometres back to your vehicle, making a total outing of about 8.5km on an easy track.
As mentioned above, the Old Coach Road is used by vehicles on their way to the Mount, so it's best to avoid this walking option during peak holiday periods.
Skeleton Hill
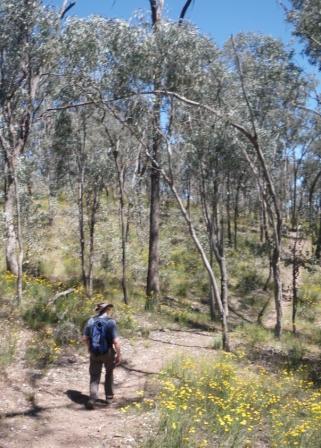
This walk covers a promontory of granitic rock that extends to the south within the National Park; the walk offers excellent views, beautiful open woodlands, and a nice workout.
Distance covered is about seven kilometres, taking about two hours, and this nice little adventure is rated as AWTGS-3. A pair of formal walking shoes are needed for this walk, as well as a set of trekking poles (due to the loose surfaces encountered)
The recommended map is Rooftop Maps Beechworth-Albury-Wangaratta Adventure Map, and the action starts by driving towards the Honeyeater Picnic Area (see above), but instead of taking Cyanide Road, keep straight-ahead, and continue through to where Skeleton Hill Road goes off to the right.
Park your vehicles here (there is a reasonable amount of space at this intersection) and begin the steady climb up to the Skeleton Hill ridge system, about two kilometres away.
On the way, there are amazing views to the north-west, as well as lots of rocky outcrops, and some very pleasing woodlands.

Continue on past the Skeleton Hill sign-post (some more great views at this point) and this will lead to a sweeping (albeit sharp) curve to the left. Keep straight-ahead at this point, and side-step a locked gate.
This now leads to a ridge system that continues for about 500m, terminating just short of a navigation beacon.
Turn around at this point, and make your way back to the sweeping bend referred to above.
Keep right at this point (that is, take the continuation of Skeleton Hill Road; don't back-track the way you came).
This now leads to a gradual descent back to the valley floor, with more great views, this time to the south.
Farmland appears on the right, and then the track swings to the left, with more impressive woodlands.
Ignore Koala Track going off the the right, and continue along Skeleton Hill Road to where it intersects a larger (wider) bush track.
Keep left here, and it is only a short distance to your vehicles.
Sugarloaf Reserve [AWTGS-3]
Sugarloaf Reserve is located within the same geological formation that typifies Chiltern - Mount Pilot National Park, but is outside of the Park boundary. The same granite outcrops and rugged scenery are present here, and this makes a nice outing, with a short walk that incorporates some great views over the surrounding floodplain.
The walk involves a short ridgeline route that is not formally documented (no signage, no clear route to follow) and a keen sense of direction is required to complete the loop as described. The ridgeline also requires good footwear, and careful foot placement, as there are some loose rocks out there.
Rooftop Maps, Beechworth - Albury - Wangaratta Adventure Map provides a good overview of the location of the Reserve (south-east of Springhurst; south-west of Chiltern township), and the best access is from the north (via Rocky Creek Road and Sandersons Lane). This is an unsealed route, but is usually quite well graded, and is no problem for a sedan.
If you want to approach Sugarloaf from the south, then a vehicle with a reasonable amount of ground clearance will be necessary, as there is a deep gully to negotiate at Diddah Diddah Creek.
The car parking area is off to the right when approaching from the north, and there is plenty of room to park the hardware in the shade, with the two arms of the walking track being clearly visible from here. Taking the right-hand (northerly) track, this leads upslope to some really interesting rock formations, with the previously mentioned nice views over the surrounding floodplain becoming apparent as you reach the ridge line.
As well as the views, all of the typical weathering aspects of granite can be seen in many places; chemical weathering from forest floor detritus, and the onion skin delamination that is characteristic of all forms of granite.
Turning left (south) at the ridgeline, there is a fenceline to your right (delineating a block of private property), and if you basically follow the ridgeline south, keeping reasonably close to the left (east) side of the ridge, then the other arm of the walking track will come into view after about 300 metres.
Make you way down to this vehicular track, and then weave your way back to the car park.
Overall walking distance is about 1200 metres, and this takes about 30 minutes to complete.
Tuan Track [AWTGS-3]
Tuan Track can be found on the Chiltern-Rutherglen Road, not far out of Chiltern, with access via Depot Road (Tuan Track is named after a local species of marsupial).
There is some car parking space just off the bitumen, but if preferred, drive through to the Tuan Camping Area (about 350m from the bitumen).
The VicMap 1:50 000 map sheet Albury provides a good overview of the location of the area.
The walk is notionally rated as AWTGS-2, but given the loose surface (trekking poles are highly recommended), and the tricky navigation at the eastern portion of the walk, AWTGS-3 is a better rating.
Also, be aware that there can be occasional motorised traffic on parts of this route, and that holiday periods are best avoided.
Assuming a start from just off the bitumen, this is a 7.5km walk, following a "P-shaped" route.
It's about 350m to the camping area, and then about 1.5km to the Babbler Track turn-off, via Tuan Track.
Ignore this turn-off, and continue through to Bartley Track, at about the 1.7km mark. The Bartley Family were early pioneers in this area, and their former homestead site will be encountered shortly.
Follow Bartley Track through to the environs of the Chiltern-Howlong Road (this is at about 3.05km from the start).
Just prior to meeting up with this stretch of bitumen, there is an irregular series of orange triangles (pointing to the left - north) which will lead you northwards to the return portion of Bartley Track (via a short section on Mount Pleasant Road, at the 4.10km mark).
There is also an information board in this area, giving the history of the Bartley Family; some of their fruit trees are also nearby.
Following Bartley Track, the return portion of Tuan Track is encountered at about 5.65km, and the camping area is then reached at about 7km, and then it's a further 350m back to the start.
[Please note that some descriptions of this walk advocate walking right alongside the bitumen of the Chiltern-Howlong Road, this is not necessary, nor safe.]
White Box Walking Track [AWTGS-2]
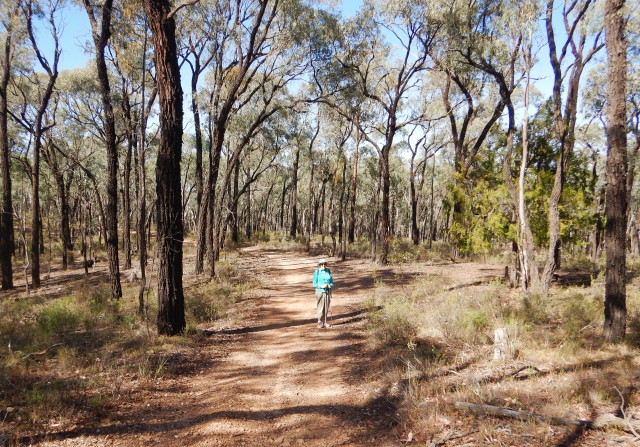
White Box Walking Track is based on a section of the National Park to the east of Chiltern township, and loops around through whitebox and ironbark areas of the Park.
The walk covers about 8.5km of undulating (and interesting) terrain with great views, and a variety of vegetation seres. Walking time is about three hours (most groups finish the walk in about 2hrs 40mins).
An informative brochure on the walk is available from the Chiltern VIC, from a nice green box at the start of the walk and from the Parks Victoria website (www.parks.vic.gov.au).
There are numbered information boards along the walking track route, and these (as well as the brochure) provide a running commentary on each area of interest.
Initial access is by taking the Chiltern turn-off from the Freeway, or by taking the Chiltern Road out of Beechworth. From the Freeway exit ramp, you need to follow the signage pointing to the National Park, swinging north onto Lancashire Gap Road, and then Cyanide Road (Cyanide was used in the processing of gold extract, hence the name of this road, and the small reservoir at the picnic area). From the Beechworth direction, turn right onto Lancashire Gap Road, and then Cyanide Road.
In either case, the last kilometre is on an unsealed roadway, and the signage leads to the very pleasant Honeyeater Picnic Area. There is plenty of car parking spaces, and the usual array of day visitor amenities (including a toilet) at the picnic area, and this is a great place to gear up for one of the North-east’s best bushwalks. An information board at the picnic area provides plenty of blurb about what is on offer in the local area, and the White Box Walking Track is signposted off to the north from this board
The initial part of the walk involves stepping it out along a short section of Cyanide Road, and then following the signage, and little red arrows, off to the left. This leads upslope to the first item of interest, the Golden Bar Mine; this is one of several abandoned mining leases in the Park, and shows the usual scars to the landscape.
Continuing onwards, and upwards, the track passes over a watershed, and then descends to Ballarat Road, where the track swings to the right (along the roadway) for about 10m, and then continues its traverse of bushland off to the left.
The track now crosses a moist area, with a couple of bush bridges to get you over the worst of the soggy bits, and then basically follows an undulating path up a scenic valley, before emerging onto Pooleys Track.
The route now climbs up over a small ridge, before dropping down to where White Box Road and Rubida Track meet each other (the PDF map does not show Rubida Track). A short walk up White Box Road now leads to a signposted right turn, with the walking track now starting a steady climb to the highest point of the walk (about 350m according to our GPS). On the way, and at the summit, the track passes through an excellent coupe of white box, and this is a great place to stop for lunch.
Leaving the white box area behind, the track descends to briefly meet up with Ballarat Road once more, and then crosses over a small ridge to All Nations Road. Head left at this roadway for a few hundred metres, and look out for the signage pointing off to the right, and the final stage of the walk, the descent to Cyanide Dam and the Honeyeater Picnic Area.
The final part of the walk passes along the upstream side of Cyanide Dam, and makes use of a boardwalk to get to the Picnic Area.
Yeddonba Rock Art Site
The Yeddonba Rock Art Site is accessible by turning north off the Chiltern - Beechworth Road, about 12km from Chiltern, 15km from Beechworth).
From the bitumen, follow the well surfaced gravel road to the Yeddonba car parking area. There are tables, chairs and fireplaces here, so this is a good place to have morning tea, or lunch, prior to tackling the 45 minute walking track.
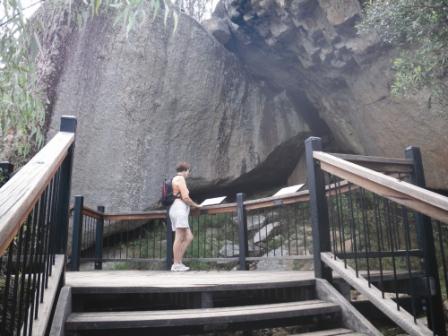
Prior to European settlement, Yeddonba was home to an aboriginal community, with several caves and overhangs providing protection from the seasonal extremes. As can be seen from several places on the walking track, the views for these people would have been quite remarkable, and they would have had easy access to high ground, floodplains and wetlands for their hunter-gatherer lifestyle.
An information shelter at the car park details much about the aboriginal community that created the artwork, and there are a series of information boards along the track that provide more detail, and commentary.
The track involves as much vertical work, as horizontal work, and can be quite fatiguing on a hot day (wet weather adds slippery rocks to the equation), but once at the artwork site, there is a raised walkway which provides a good viewing platform.
The artwork is now quite faded, and it is not certain what the images are supposed to represent; one interpretation is that it is a thylacine (also known as the Tasmanian Tiger), long extinct on the Australian mainland. Several other examples of thylacine artwork have been found in Australia, notably on the Burrup Peninsula in Western Australia.
In some parts of Australia (such as the Kimberley) there is a periodic ceremonial renewal of existing artwork, but that does not appear to have occurred here. However, the setting makes up for the lack of clarity, and the lack of renewal gives impact to the age of the artwork.
Having finished admiring the artwork, you can return to the car park via the incoming route, or continue so as to make a loop.
Chiltern - Mount Pilot National Park Scenic Drive
Friends of Chiltern-Mount Pilot National Park
Intro Screen on a fresh browser page
COPYRIGHT © 1995-2025, Chris McLaughlin.